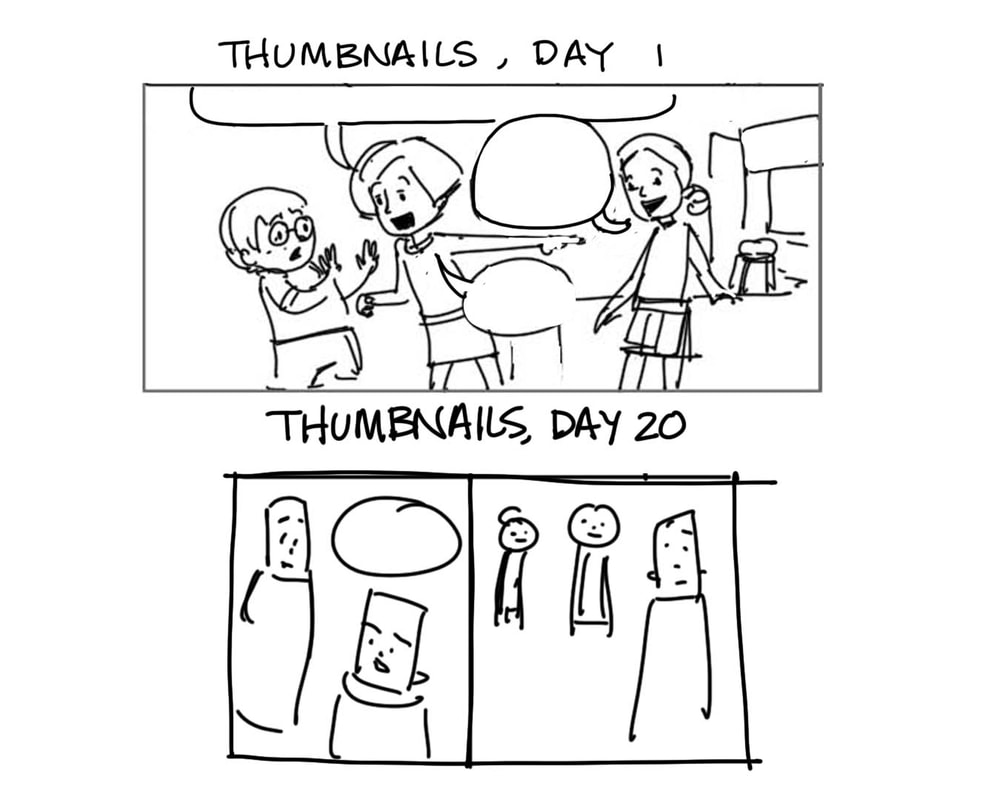
 How it started vs How it ended How does one start the process of creating images for a 240 page graphic novel? With ideas. Ideas drawn small and quickly to explore the various facets of your storytelling process--- from page layout to panel composition. This process is called 'thumbnailing' because the drawings are supposed to be very small. Lots of comic artists do this in different ways. Some people will draw on their actual script with a thumbnail page layout in the margins. Some people draw on post it notes. I drew my thumbnails digitally which was really easy and had some benefits. One of the benefits was that I could create a template for the size of the page, then copy and paste that on an entire sheet so I could see the flow of several pages at once. 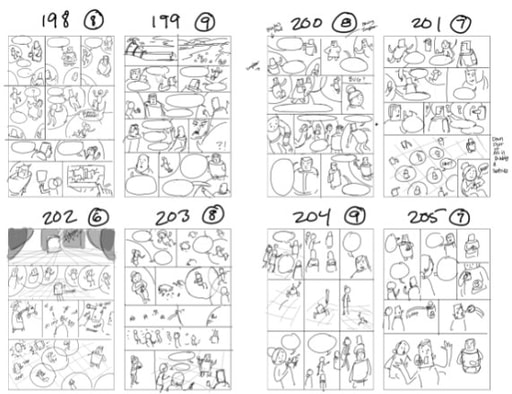 Working digitally made it easier to adjust panels and layouts by using the transform tool. If I drew something too small or too big, I could easily make an adjustment to the size of it. If I needed to copy a panel and duplicate it to keep a sequential movement consistent, I could easily copy and paste it. One thing I had to keep in mind was that the zoom feature could hinder my process of keeping my drawings rough. I have a tendency to zoom in on an image and get too involved in the nitty gritty details. I solved this problem by keeping my dpi to 100 pixels per inch instead of 300 dpi. The low resolution of the image would prevent me from working too detailed because the more I zoomed into the document, the more pixelated it would become. This forced me to work large and rough. Churning out 240 pages of thumbnails in a short period of time is tough. I am poor at time management skills but am actively working on improving. I can proudly say that I am better at it than I was years ago, but I'm always trying to get better at it. I realized that I needed to gamify the process for me to make it more fun and less "work". I started to time myself to see how long it took me to complete one page of thumbnails. After doing a few in the beginning, I realized it took me around 10 minutes to complete a page. My goal was to get faster at completing them, so I started writing the start time and stop time for each page. 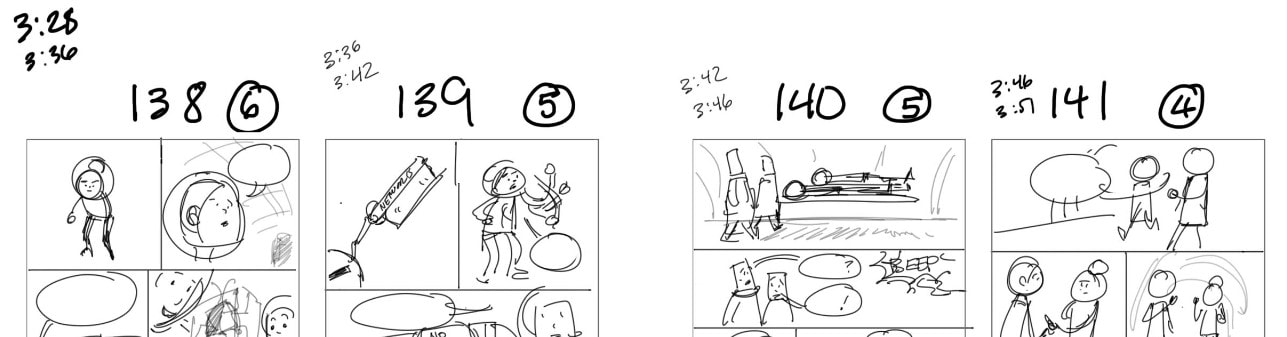 8 minutes, 6 minutes, 4 minutes, 11 minutes Depending on the complexity of the page, some layouts would take longer than others. But at least I was documenting information that helped me to realize how many pages I needed to complete per day in order to meet my deadline.
Seeing the numbers really helped me to visualize the abstract concept of time. Also, my thumbnails started out REALLY super tight in the beginning. I was still getting accustomed to drawing these characters that I had designed and their shapes weren't yet ingrained in my brain. A few days into the process, I was able to rough them in pretty quickly, but they also started to look like blobs. In the end, I just needed to figure out the 'camera angles' of each shot (storyboard lingo) or the point of view for each panel composition. When I was done, I sent these to my editor and art director, along with the manuscript, and prayed that they were able to figure out what I drew!
2 Comments
Here's some designs I've been working on for the graphic novel. Let me know what you think in the comments. :-) 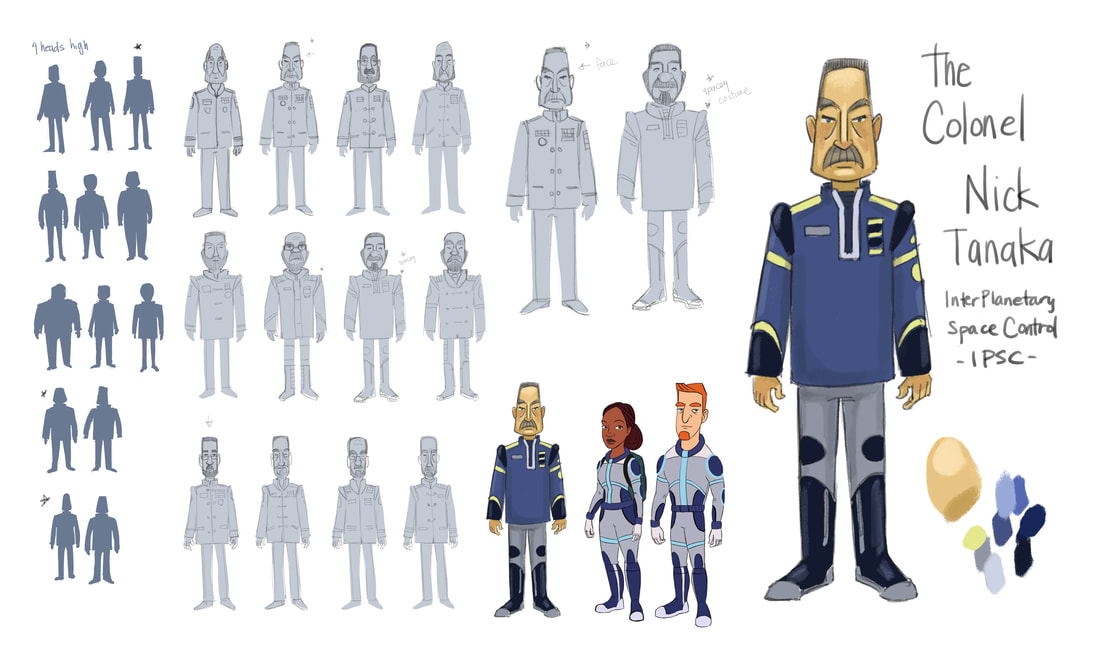 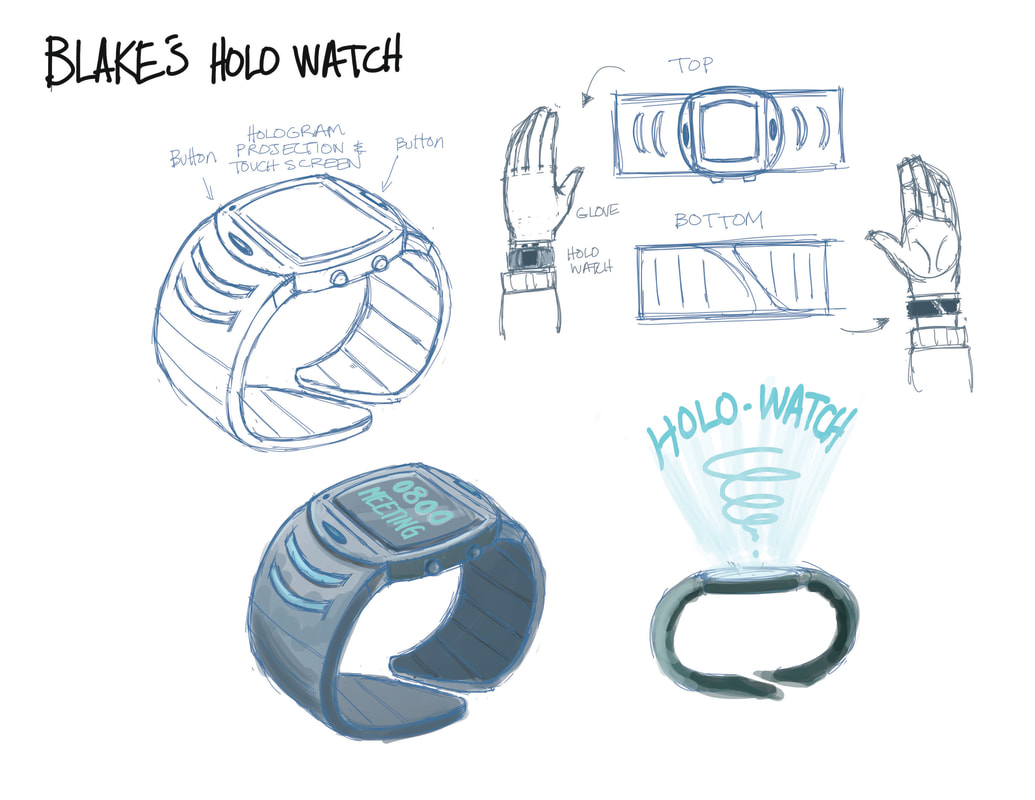 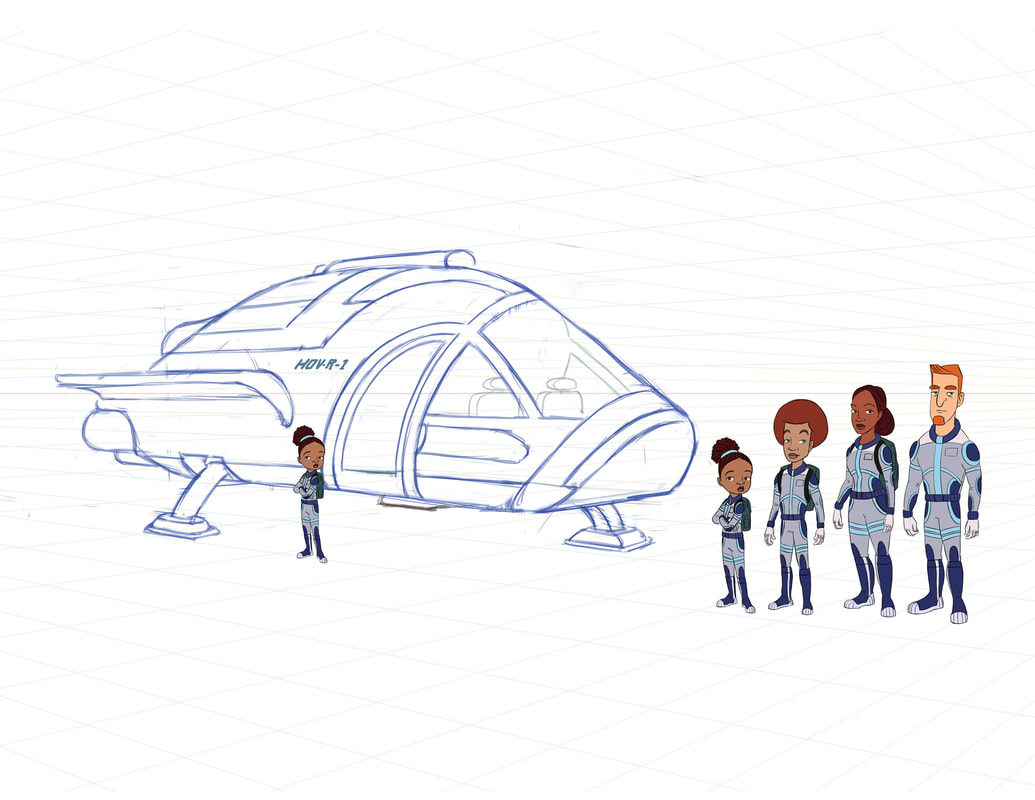 Boy, I really had hoped to get a lot of work done on my graphic novel this summer. Instead, I spent this summer battling racism. The death of George Floyd launched a torrent of social unrest across the globe. Black Lives Matter gained a new momentum with an energy not seen since the 1960's and I became a target of racial harassment from a colleague at the university where I teach, Laguna College of Art + Design. It's too much to go into here, but I wanted to share these news articles that document the amount of difficulty I experienced this summer. Who I am as a Black creator will always affect how people see me. I have come to the sad realization that some people still do not see me as their equal. After much thought and deliberation I am finally comfortable enough to tell those people, I do not create stories for you. I do not make content for you. If you cannot see the injustices of systemic racism, do not believe that Black lives matter, and are at the very least, tolerant of those who support the promotion of hate, inequality, and injustice, then I do not want your support or your readership. On the contrary, if you find yourself here and do support the idea of racial equality and inclusion, want to see more stories that showcase diversity, Black joy, and Black strength, and are willing to support Black creators, then thank you for being here. I welcome you with open arms and hope my stories and my experiences can bring some richness to your world. 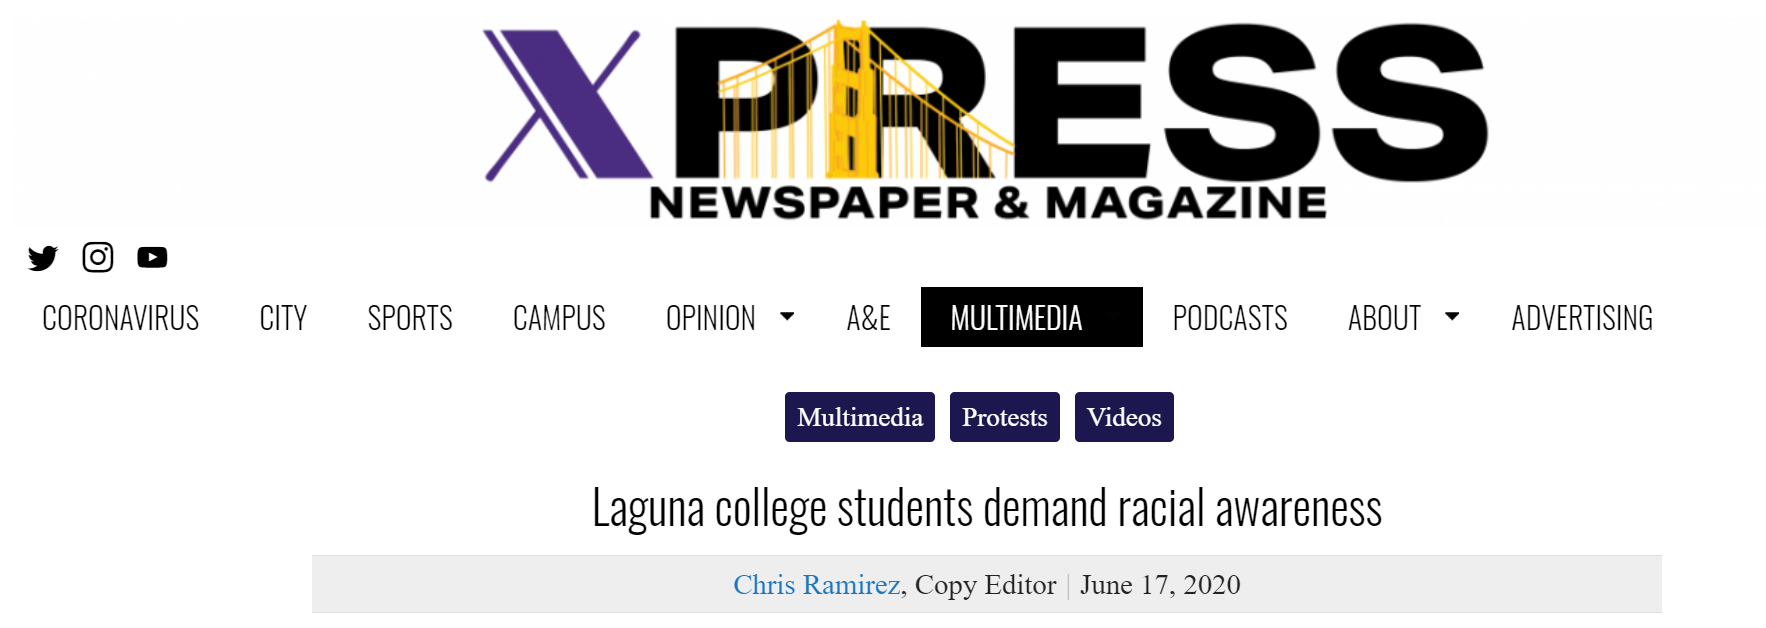 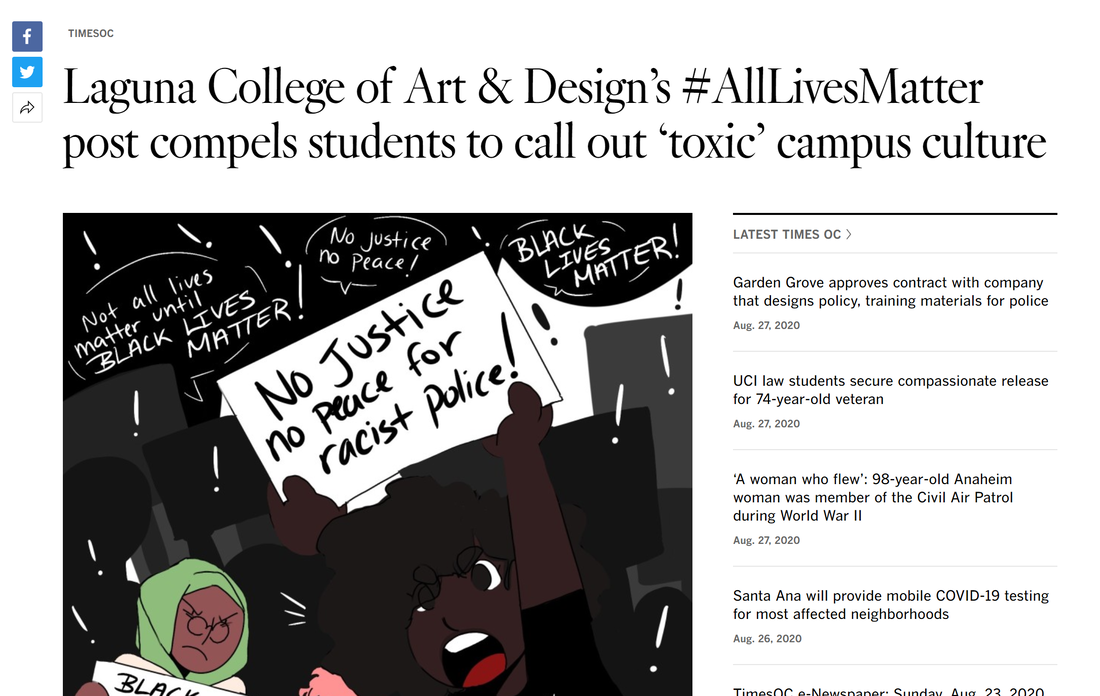  Here is the process I went through while designing additional characters for my graphic novel. Usually, the first sketches aren't the best and I need to hammer away at it until I come up with something really good. I want to make sure the new characters I'm designing will work well with my existing characters, which is why I build them next to my other characters. I wouldn't want the new characters to have a head mass that was too big or too small, and I can size them all up next to each other and concentrate on using shapes that will bring variety to the lineup. 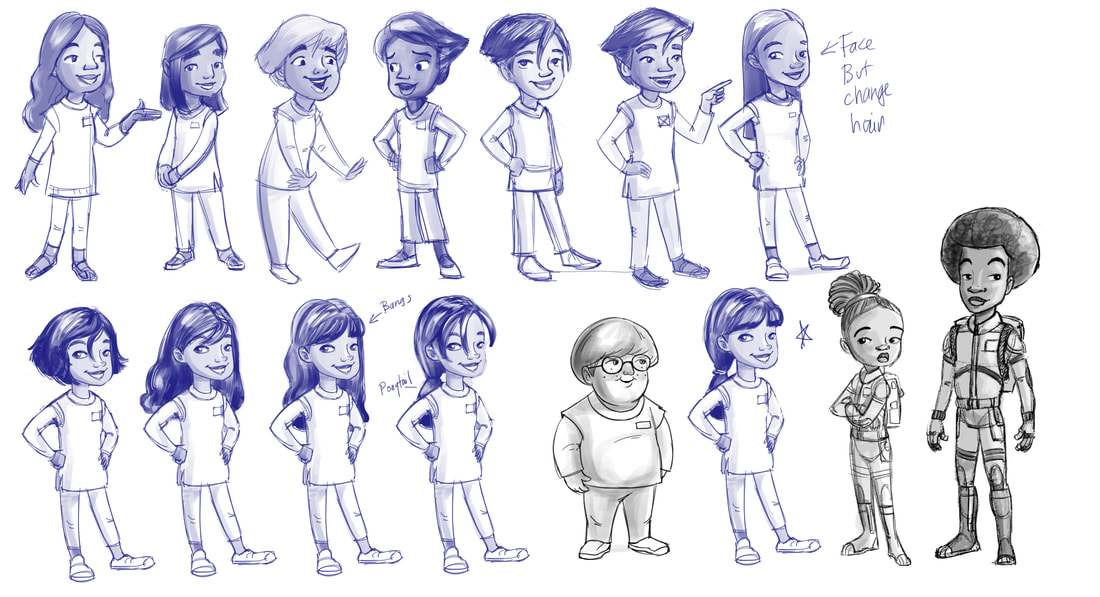 The feedback I get from others helps me to refine the characters even further. I liked the girl on the top right the most, but both of my daughters thought her hair was too boring and plain. I did variations on the bottom and then got even more feedback to combine the bangs from one design and the ponytail from another. Voila! I have a character that works and even got feedback from my family. *I also thought if I could design a younger Tahani from our favorite show "The Good Place," she'd be pretty cute.*  For the next character, the inspiration came from a viral video of a high school percussionist... I loved this kid so much! When I saw him, I knew I wanted my character to resemble him. 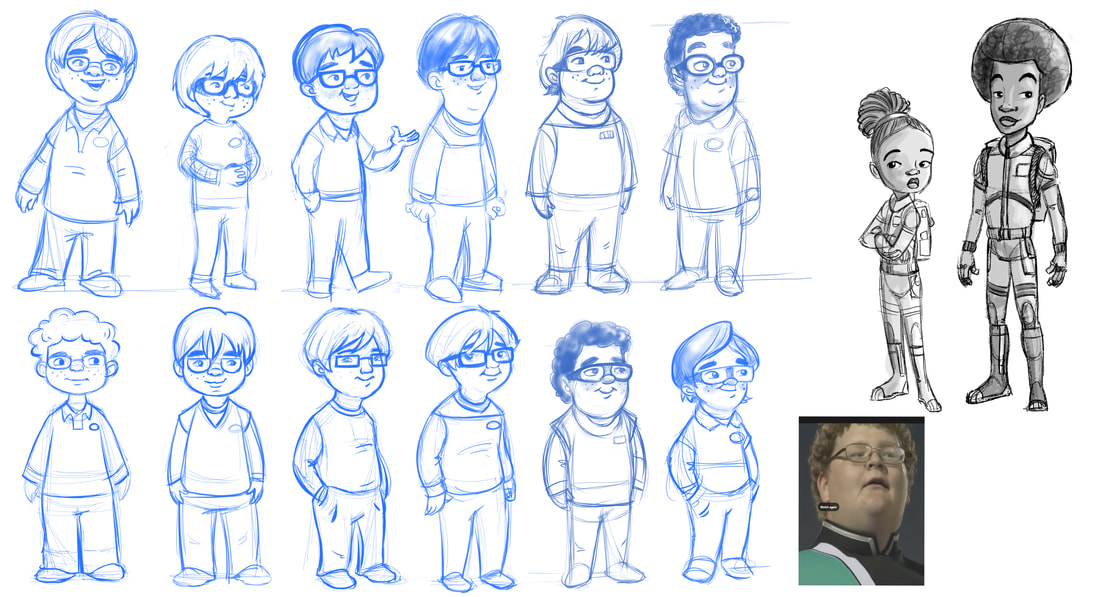 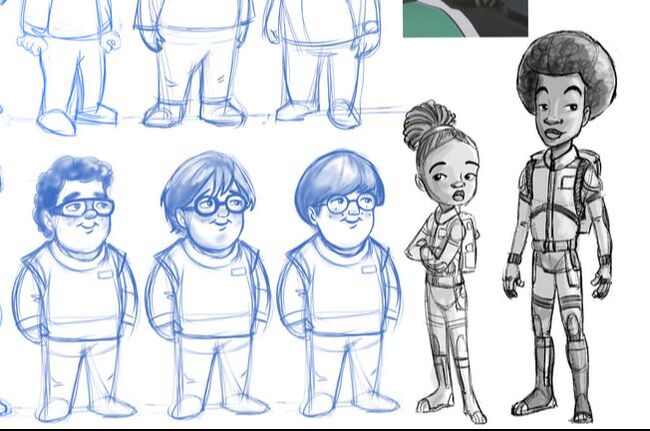 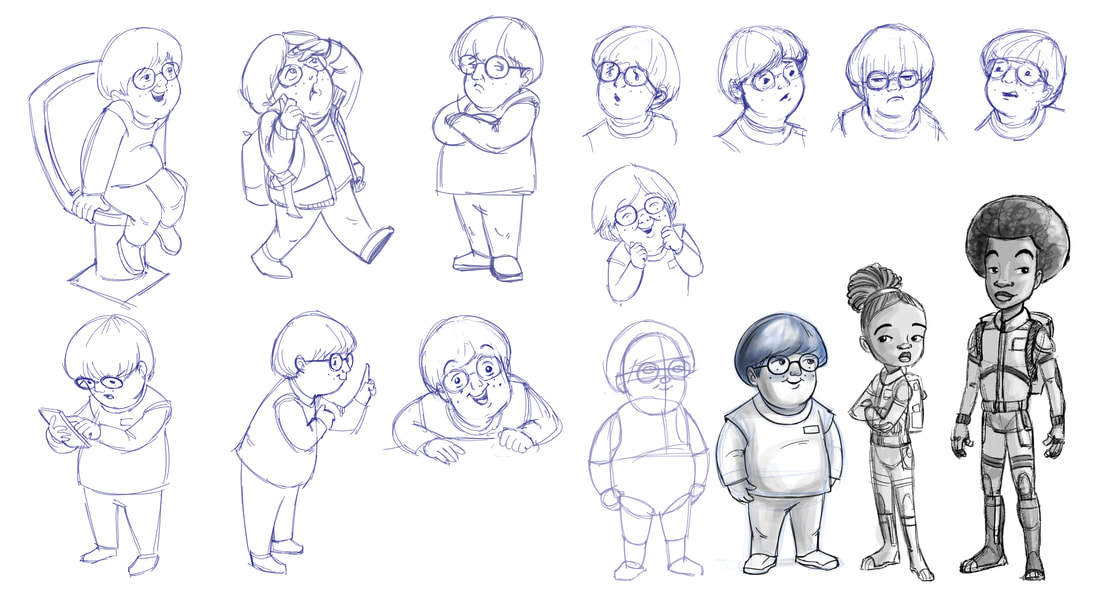 Am I the only one who goes into designing characters with a distinct person in mind? Maybe. Sometimes I draw people that end up looking like someone I know inadvertently. Once I realize it, I usually go all in and make the character intentionally look like the person. It's fun to say, "Hey, Kevin! I put you in my illustration in Highlights Magazine!"
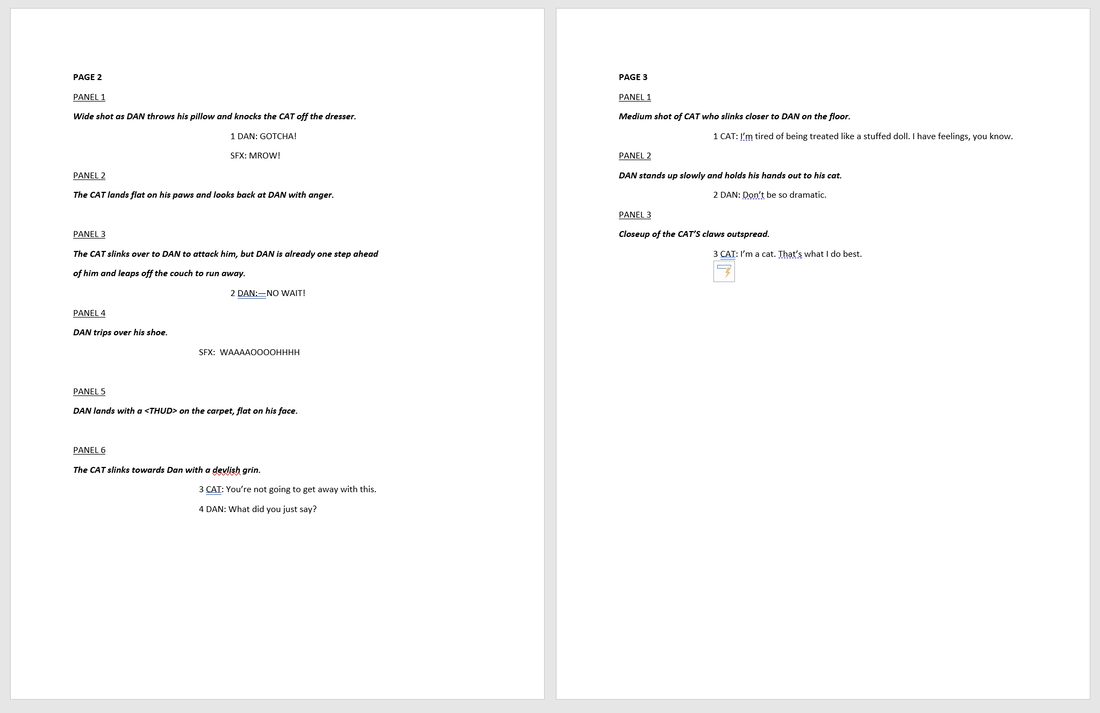 When the co-author and I began writing we had one important question: How do you format a manuscript for a graphic novel? We had no clue. We knew that there would be panels. We knew that there would be pages. But we didn't know how to break all of that up into a functional manuscript that would tell us how many panels per page and thus, how many pages of the graphic novel we'd have. The co-author had no former background in comic books, and me as the illustrator with no former experience in writing a graphic novel manuscript, we first approached it in an odd way. I figured, the least he could do is panel the dialog out with one or two characters talking, three at most. He also formatted the original manuscript in scrivener (not the best idea). We assumed that roughly a page of the manuscript would equal a page of a graphic novel, but we didn't know how the math worked out or why it worked out that way. In the end, we were given a sample page from our editor that looked something like this: Each page is labeled with the page number at the top. Each panel is labeled with the description at the top in bold. Character names are all caps. Each dialog text has a number before the name so at the end you'll know how many dialog bubbles there should be. Each page needs to be planned out as to how many panels you want for a particular page. You'll notice that Page 2 has only 6 panels and Page 3 has only 3 panels. So you're going to have to figure out how many panels you want on each page. How do you do that? Well, I had to figure that out while going through the story with Keith. Initially, he only knew where he wanted to section off the panels, but he had no idea how many panels there should be per page. So, during our edits, we reviewed the manuscript. I thumbnailed out what I thought each page should look like and he adjusted the manuscript to reflect that. In the beginning, I was sketching out the art for each page, but then as we got further along, I stopped sketching and just started figuring out how big/small/long/tall the panels would be and what each page might look like. 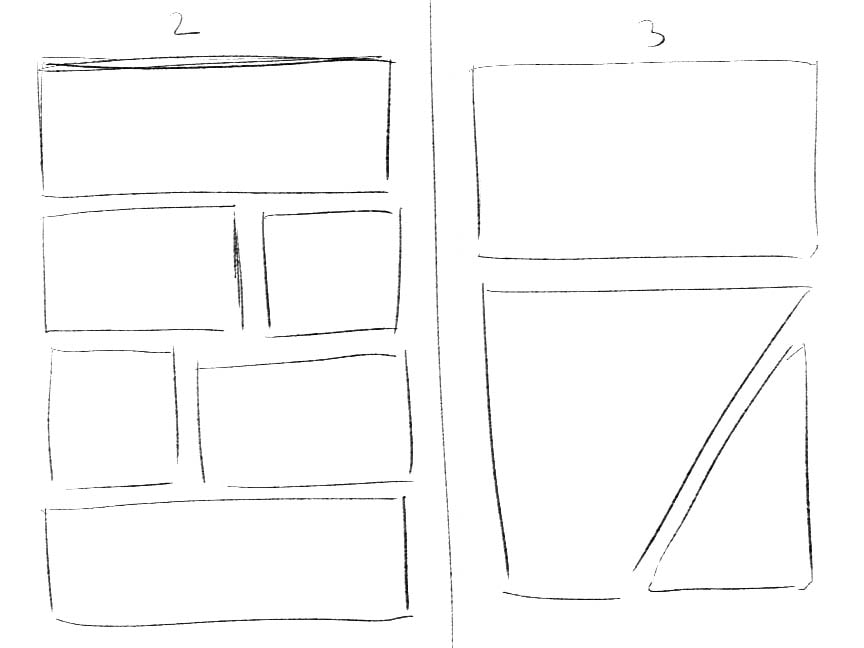 It took us about a month of reformatting our script and thumbnailing out the panels. We started the editing session with roughly 280 pages of script. We ended the editing session with 282 graphic novel pages. Now we wait to hear back from the editor and see how much more we need to cut, thus rendering all my thumbnailing completely null and void. Ha!
|
 RSS Feed